A dashboard camera or a dashcam is an onboard camera that continuously records a vehicle’s internal and external views, either through the front windscreen, rear or other windows. These cameras neatly fit on the dashboard or the rear-view mirrors. Dashcams act as a 24×7 surveillance instrument for the vehicle and the recorded footage acts as proof in case of an accident or mishap. Installing a dashcam helps to mitigate road rage and weeds out the existence of bad drivers.
Truck dashcams have become immensely popular over the past few years. Dashcams can fully record every detail of the road and are extremely beneficial for truck drivers. It helps them to report indisciplined drivers, avoid insurance fraud and also record incidents while being away from the truck.
This article will provide a guide on how to wire a front as well as rear dashcam and offer tips on how to position a dashcam correctly in a truck.
How to wire dash cam
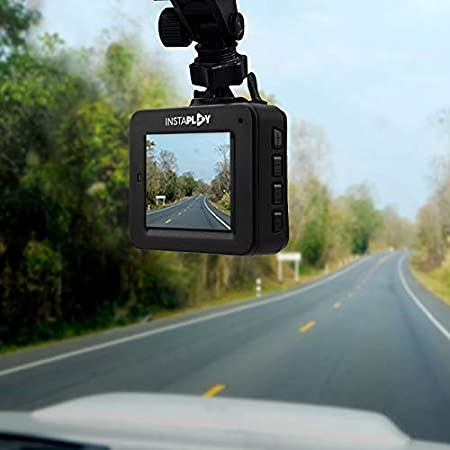
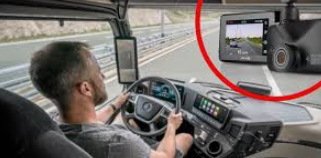
Step 1: Decide on the positioning of the dashcam. The driver of the vehicle must try out different positions suitable to them for placing the dashcam. It is suggested that the dashcam is placed within an arm’s reach of the driver. It must however be ensured that the dashcam does not in any way obstruct the driver’s view of the road.

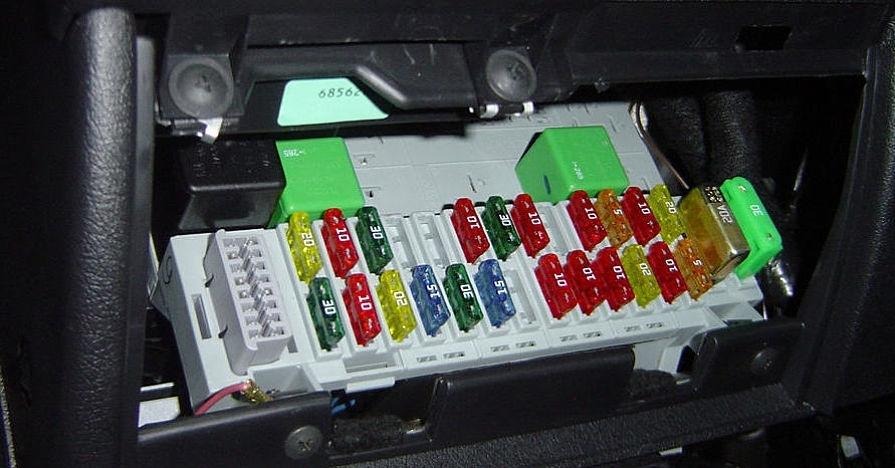
Step 2: Locate the vehicle’s fuse box. Installing a dashcam requires drawing the power cable from the dashcam to the fuse box. Usually, the fuse box is located below the dashboard on the driver’s or passenger’s side. In such cases, the fuse box is easily accessible. One may even consult the manual in case they have difficulty in locating the fuse box of their vehicle.
Step 3: Start routing the power cable. It is important to lay the power cable roughly around the areas where it will run once it is hidden in the interior panel of the vehicle. This gives an idea about the routing track of the cable and how much slack one can leave on the way down to the fuse box. The first thing to do would be to tuck in the power cable into the headliner. The next step is to simply tug the rubber trim along the A-pillar. This would make a gap evident in which the cable can be run from the headliner to the fuse box. The A-pillar stands on both sides of the vehicles to withstand a crash and match the safety standards. In most cases it is not necessary to remove the A-pillar, although the rare cases in which this might have to be done, the installer gets complete access to this area of the vehicle for routing the power cable. The power cable is then tugged along with the wires that already exist in the A-pillar. The power cable must be routed around the sides and behind the rest of the interior panels down towards the fuse box.
Step 4: Locate a fuse that is “hot in start”. Vehicle fuses either have power all the time or only when the vehicle is running (“hot in start”). If the user wishes to have a dashcam that starts and stops automatically with the start and stop of the vehicle, the circuit kit should be connected to a hot in start fuse. A circuit tester could be used to check if the fuse has power only when the ignition key is turned on and vice versa.
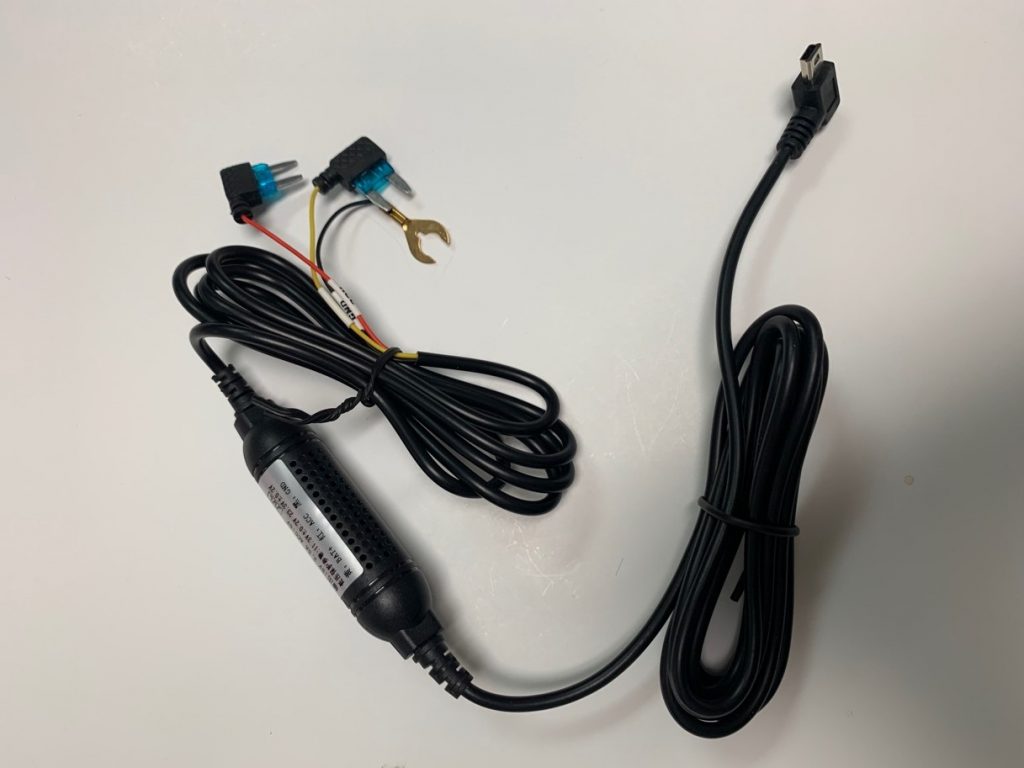
Step 5: Once the key is removed from ignition, the fuse identified in the previous step has to be pulled out gently using a pair of pliers or fuse-pullers. This fuse has to be installed in the installation kit’s add-a-circuit that is received with the dashcam. Once the fuse has been installed, the add-a-circuit has to be plugged in to the space where the hot in start fuse first was.

Step 6: The step ahead would be to locate a ground point. The installation wiring kit would have need to be grounded to the vehicle. Most trucks have one ground point located near the fuse box. The lower kick panel can be removed in order to access this ground point. This is followed by removing the bolt and adding the ground lug from the installation kit. Lugs connect the grounding conductor to the grounding electrode.
Step 7: A zip tie can be used to bundle up the extra or excess power wires together. The wiring has to be secured to a solid mounting point under the dashboard or behind the kick panel with safety. The wires can also be hidden along the weather strip. Or be tied with other wires along the A-pillar securely with tape. One must be careful to not puncture the airbags in any way.
Step 8: The final step is to test the installation. This has to be done by turning on the key in ignition to the run position. If all the above-mentioned steps have been followed properly, the dashcam should turn on and start recording as soon as the vehicle starts running. Any previously dismantled interior panel (to facilitate access) can now be restored to its original position.
More and more truck drivers are installing road-facing and driver-facing dashcams because of the various benefits they offer. Drivers often prefer installing a rear dashcam as well that furnishes an added level of security to the vehicle. Today, truck dash cams are playing a pivotal role by aiding truck drivers with insurance claims, driver training, and increased safety.
This section will suggest the easiest ways to install a rear dashcam. One of the best dashcams available in the market is that of ELD Mandate.
View : http://www.eldmandate.biz/pricing
The following items may be needed:
- Rear camera (with adhesive)
- Power cable
- Microfiber cloth
- Glass cleaner
- The inside of the rear windshield must be cleaned properly. This ensures that the adhesive sticks to the glass with a stronger bond.
- The next step is to peel off the adhesive pad of the dash camera.
- Most cameras are designed in a manner that the logo faces the inside of the cabin to ensure proper recording. In case the logo is faced towards the outer side, the footage may be recorded upside down. All details related to the positioning should be available in the user manual.
- Most vehicles have heating grid lines. The dashcam should be placed in between these lines as over heating can wear out the adhesive strength of the adhesive pad. The top middle of the rear windshield is usually the best position.
- The lens must also be centred and not tilted in any direction. It is essential to review the footage and adjust the position accordingly.
- Once mounted, the power cable has to be plugged into the rear cam. Once the rear cam has been plugged into the main unit, the camera will then turn on and begin recording. The cable wire has to be run along the pillars of the vehicle to the front end. The wires can be hidden along the plastic trim.
Where to mount dash cam in a truck
It is very important to read the manuals that come with every dashcam. These bear the necessary advice on where to mount the camera. Taking time and setting up the camera correctly is absolutely essential. The installation of the dashcam should not in any way act as an obstacle. Neither should it be a distraction and blur the driver’s view.
It is suggested that the dashcam is placed in the centre of the windshield. The best position is behind the rear-view mirror. The dashcam should not block the driver’s or the passengers’ view. It should not reduce the interior beauty of the truck. It is recommended that users thoroughly analyse the dashcam’s position from the driver’s and passengers’ seat before its final placement. If the views are clear, the installation has been correct and successful.
Thus, as we can see, the correct mounting of a dashboard camera is of paramount importance in any vehicle.